“Lumbarised S1” – The transitional (potentially mobile) lumbosacral segment and its excellent fixation via “double-ALIF”.
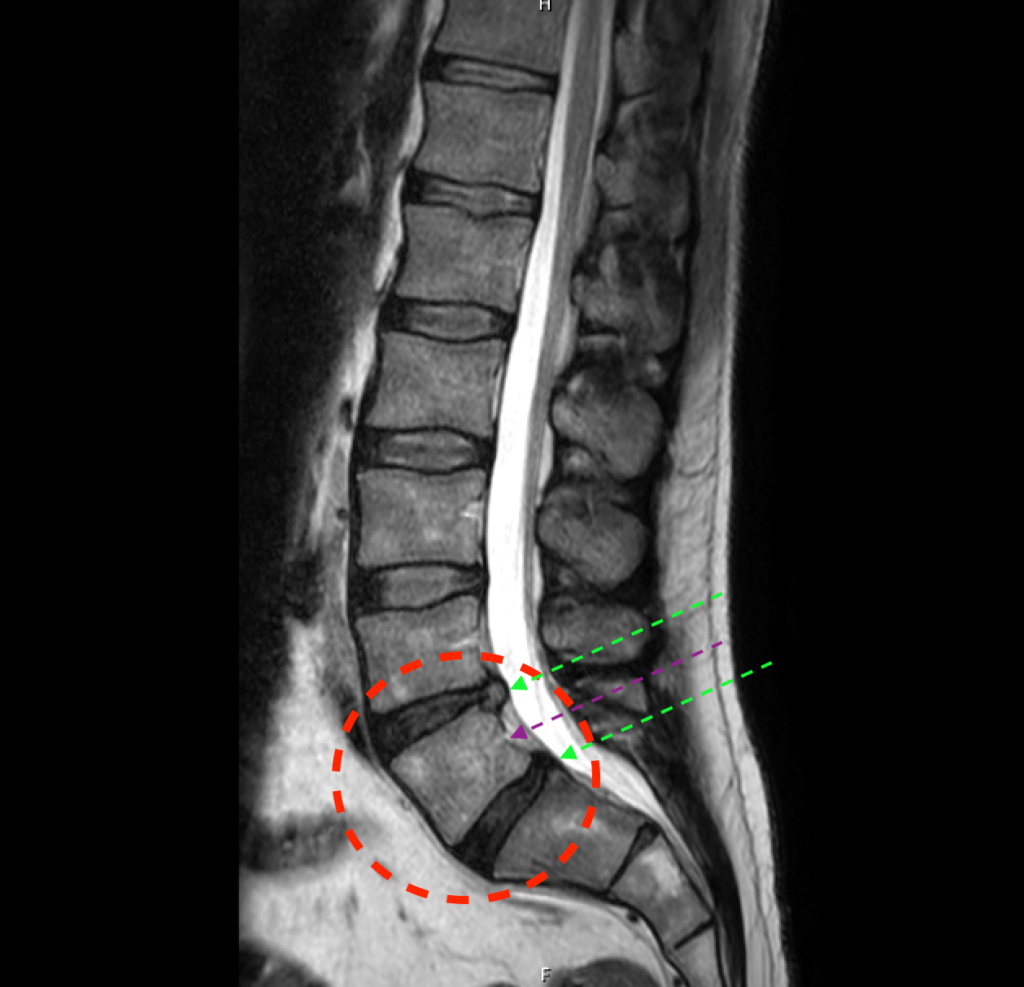
This man in his 40s, Patient “X”, presented with progressive low back pain and sciatica. The MRI below shows the dark “desiccated” discs (deranged by LOSS of hydration and height, and hence also their normal cushioning function) at “L4/5 and L5/S1” (in red dashed circle), with a forward slip (magenta dashed arrow, below) of his L5 exposing the back ends of those discs (tips of dashed green arrows below). The forward slip (spondylolisthesis) is from incomplete bone bridge (“pars interarticularis“) formation at his posterior (facet) joint region. It is also referred to as an isthmic spondylolisthesis, and its grade/severity here is 1/4 (a mild “slip”).
It turns out that Patient X’s lowest lumbar segment, which was referred to as “L5” (at the centre of the dashed red circle in the above image), is actually a half-way (“transitional“) structure; neither a true L5 nor a true S1 vertebral body, but a “lumbarised S1“. This is because it’s an S1 with a well-formed disc underneath it (most S1’s have only a “rudimentary” sliver of a disc under them). Take a look at the image below. On the left is another patient of mine, Patient Y, who also has worn/degenerative/desiccated L4/5 and L5/S1 discs. Under Patient Y’s S1 (yellow dashed circle on the left image, below), is a rudimentary/sliver disc. Compare that with Patient X’s S1 (yellow dashed circle on the right image, below), which has a relatively well formed disc below S1. This occurrence can lead to naming/nomenclature confusion, in relation to the lumbar scans.
Now, to correct Patient X’s problem, i.e., his two worn discs and a slipped “L5” (or “S1” depending on how you read the scan!) with chronic low back pain and progressive leg symptoms, I and my expert vascular and transplant surgeon accessed those discs from an incision in the stomach, where she carefully mobilised the abdominopelvic contents out of the way for me. The AP (front-on) x-ray below shows the skin retractors (four of the broad black objects, below) around the midline incision, providing access to the L4/5 disc, with its space marked by the tip of a bayonet-needle (centre of green dashed circle) held by a long curve-tip forceps.
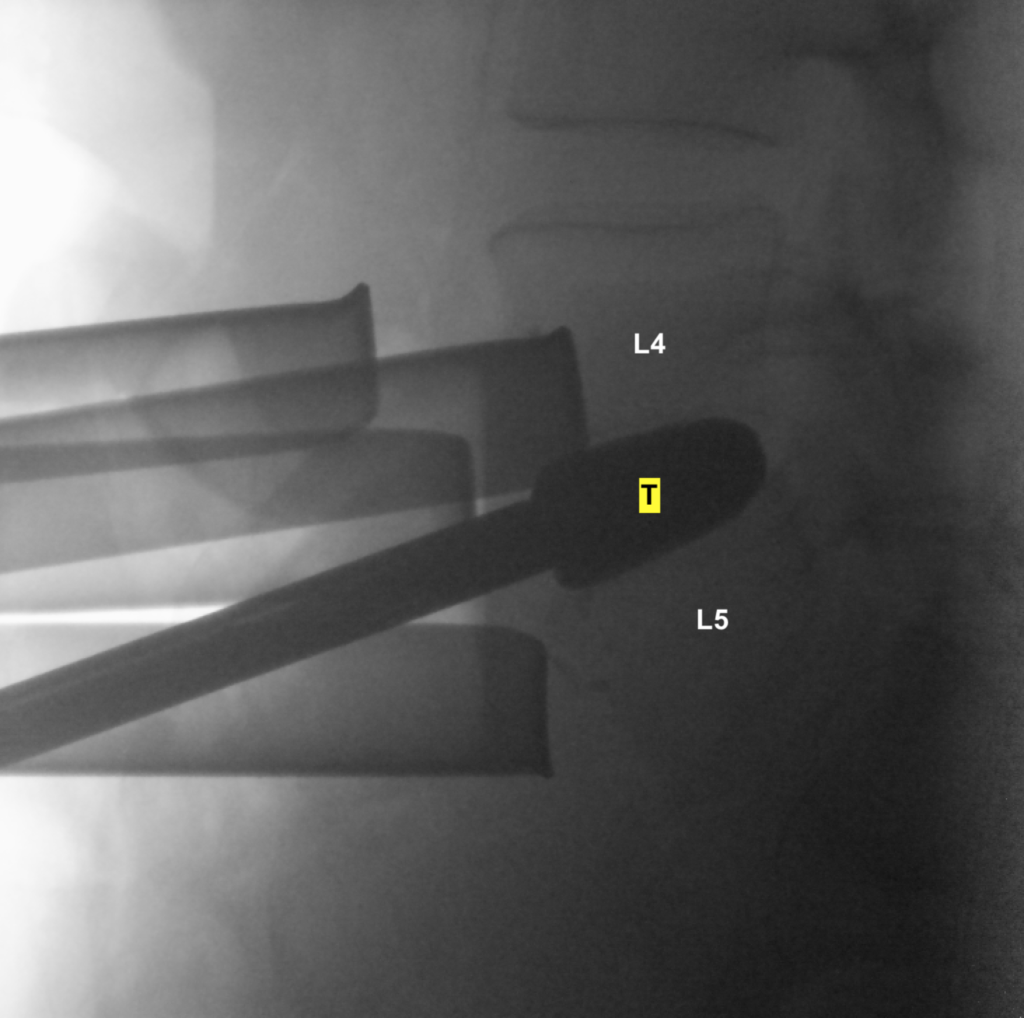
I first excised the L4/5 disc. The lateral (side-on) x-ray below shows a “trial” instrument (T) inserted into the now empty L4/5 disc space, in order to find the most suitable size and angulation (shape/lordosis) for this man (i.e., customising the L4/5 prosthesis I was about to put in).
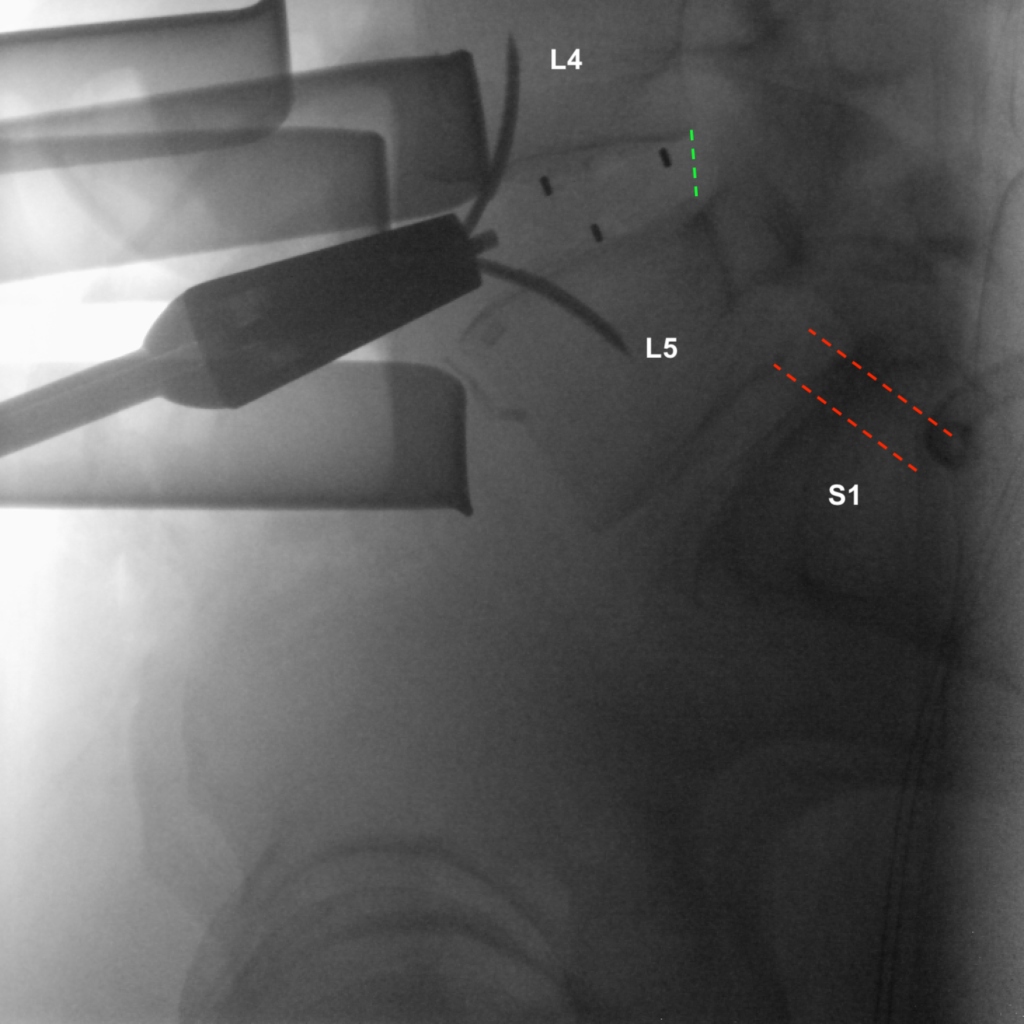
The prosthesis (a fusion cage) was then deployed, and as always, this most satisfying x-ray was taken after the cage was anchored in with its titanium curved “gull-wing” anchors purchased well in the vertebral body bone; the three dark slits in the internal structure of the PEEK plastic cage are metal x-ray markers that show where the centre and back end of cage are. You can see the alignment at L4/5 is nice (green dashed line) but the alignment at L5/S1 was still off (between red dashed lines) owing (as expected) to the patient’s slip. Hence I needed to fix L5/S1 as well, as planned.
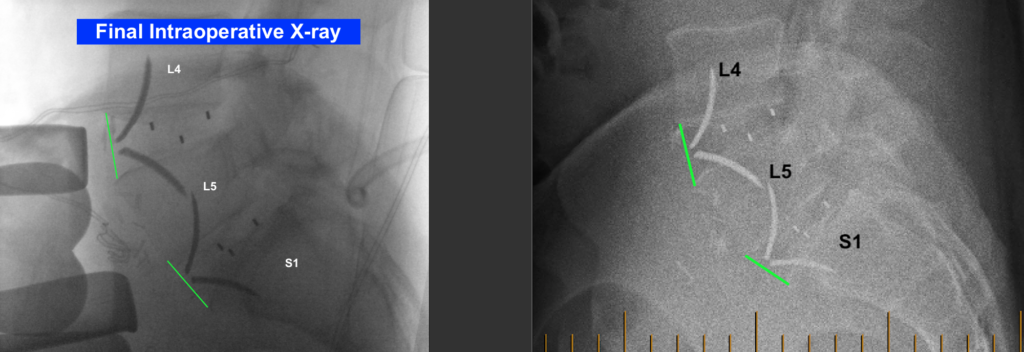
The same process as described and shown above for L4/5 was repeated at L5/S1, a tricky angle and depth in the pelvis that poses more technical challenge for the surgeons (as this patient’s “L5/S1” is actually like being at “S1/2” anatomically). The patient’s final intraoperative lateral x-ray is shown on the left below, and the post-operative x-ray (after he’s been walking around) is shown on the right, below.