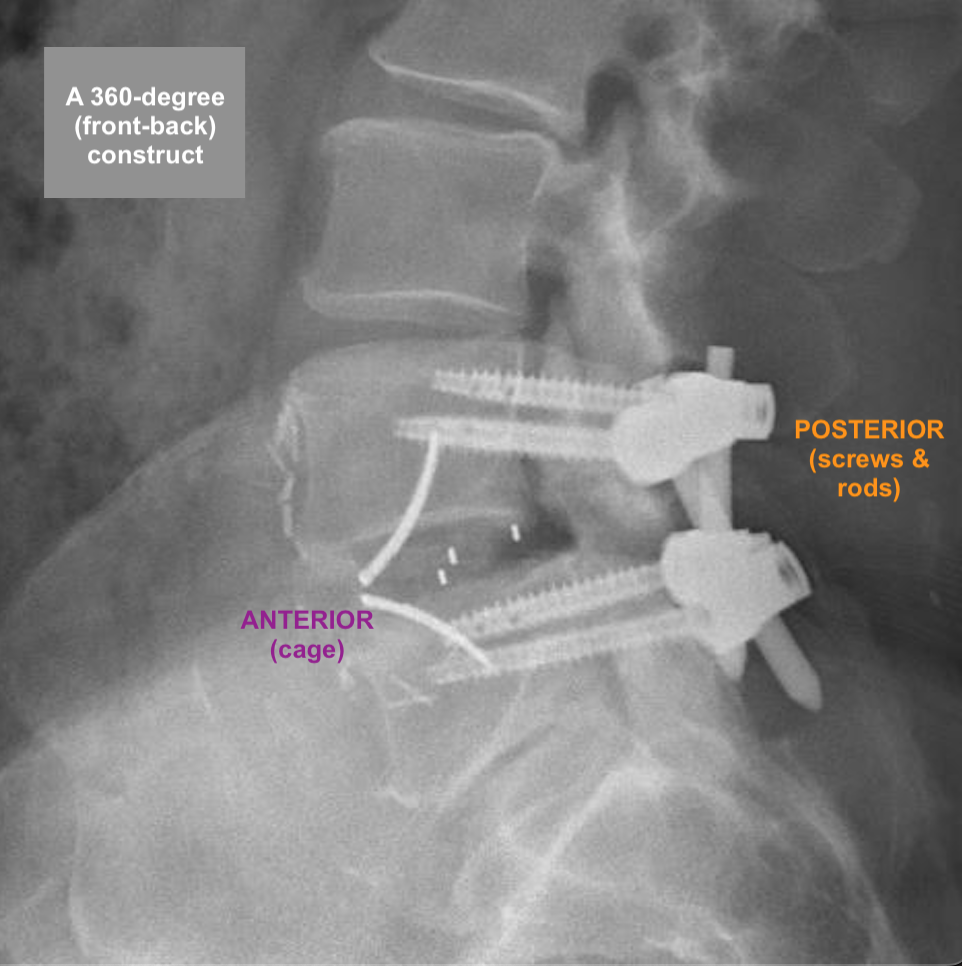
“360-degree” (“front-back”) Surgical Reconstruction of “Isthmic” and Advanced “Degenerative” Spondylolisthesis: ALIF with Posterior Back-up Instrumentation
BACKGROUND
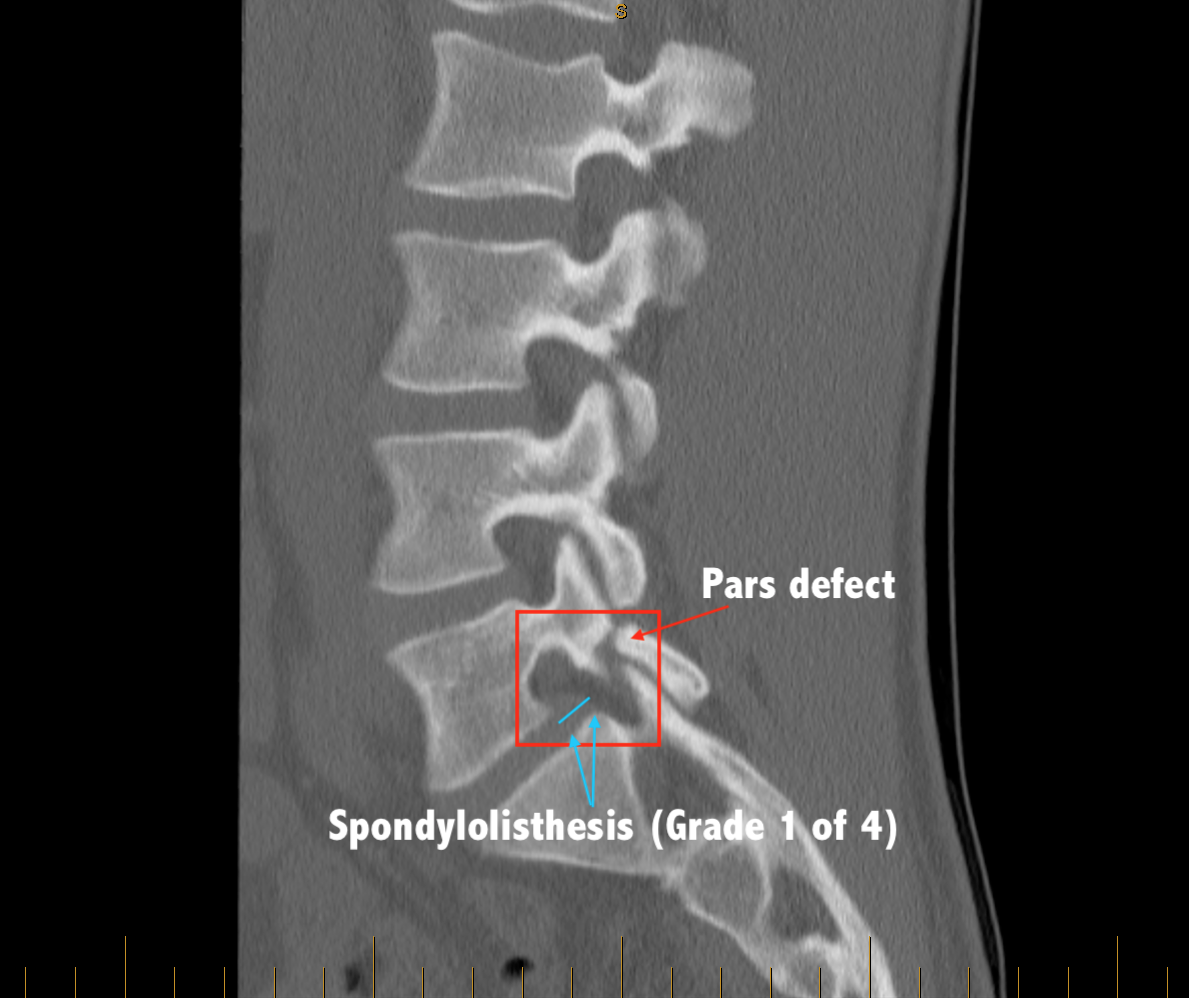
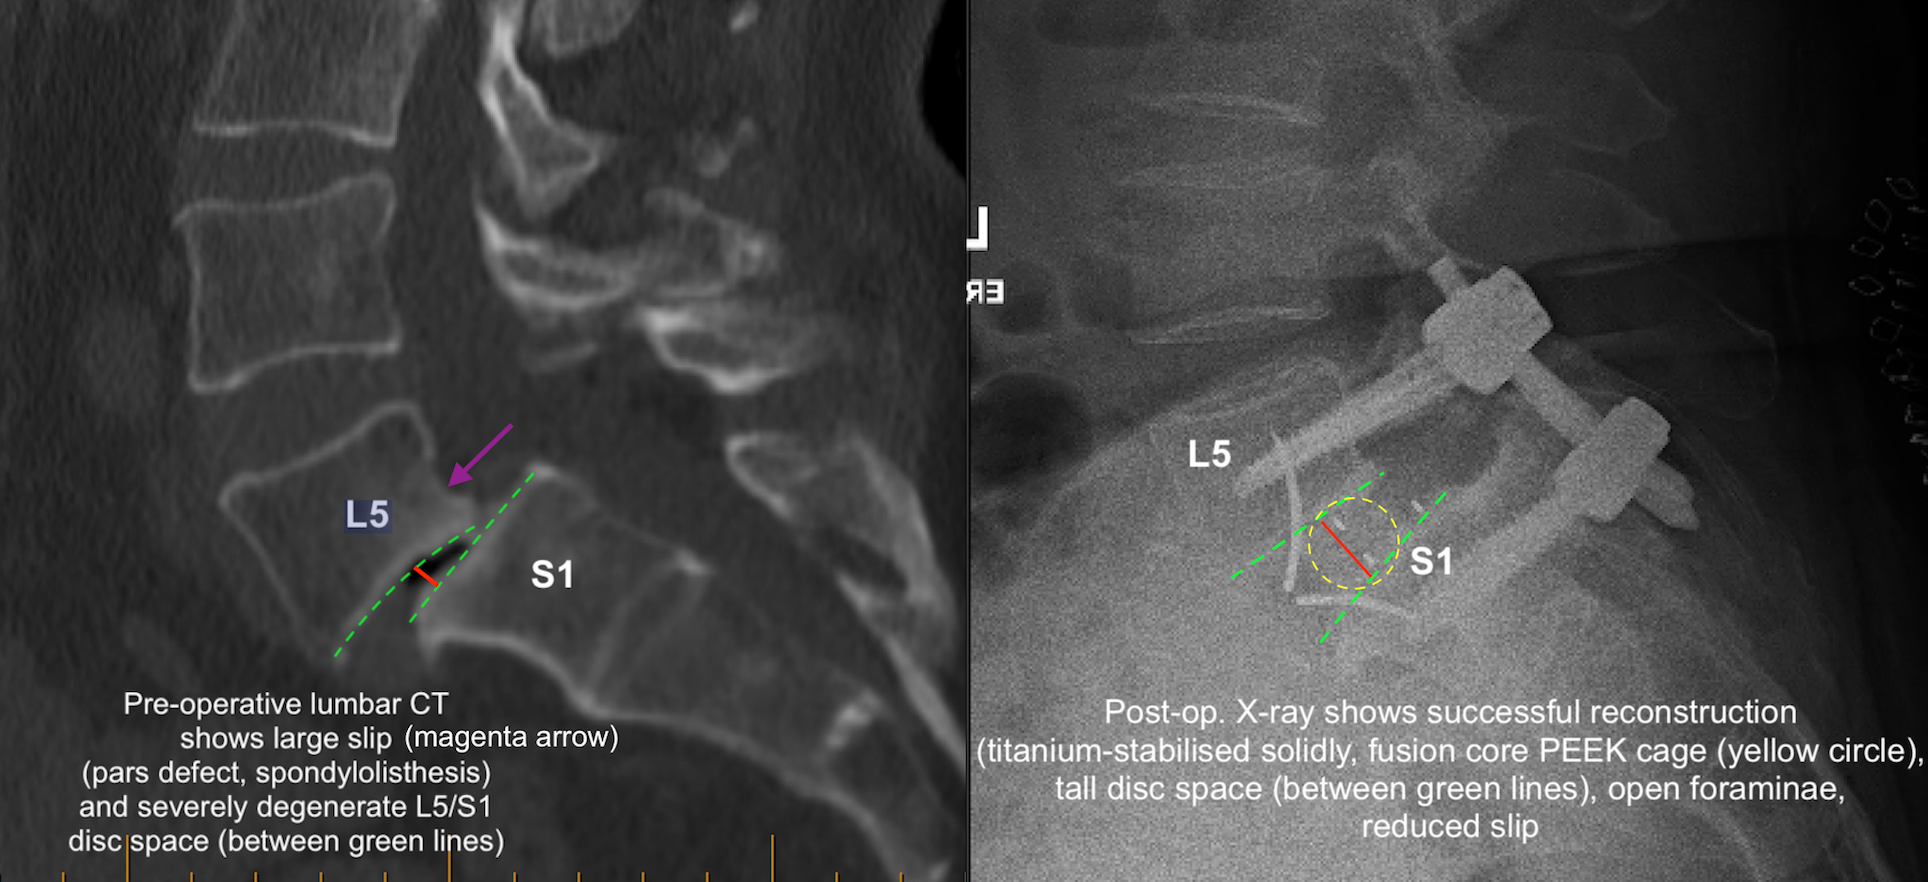
If there is a congenital (developmental) defect of a posterior stabilising structure of the spine called the pars interarticularis, then a spinal slip (spondylolisthesis) can arise from this “pars defect“. It usually becomes apparent in a person’s 30s to 40s, as the symptoms of low back pain +/- leg symptoms become more apparent and progress. Imaging then shows what the cause is (CT scan image below):
Sometimes the spondylolisthesis arises from severe degenerative changes affecting the stabilising facet joints. In such cases, the condition is referred to as “degenerative spondylolisthesis“.
If the symptoms, signs and imaging fit, and if the condition is found to be relatively debilitating for the patient, then surgical reconstruction is reasonable, especially if other medical or ‘conservative’ measures (physio-, hydro-, medications, self-stretching, pilates, acupuncture, injections, etc.) remain unhelpful.
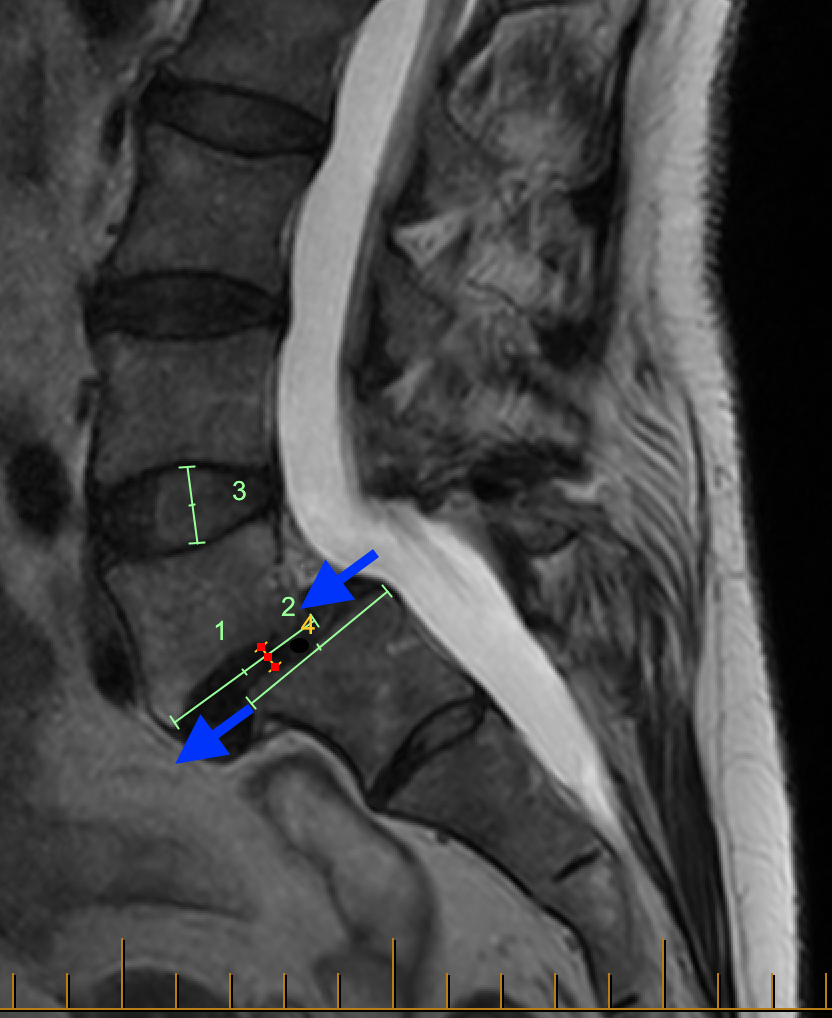
The two MRI images below show examples of spondylolisthesis affecting L5/S1 (panel immediately below) and L4/5 (panel below that). The blue arrows show the slip at each affected level. The slips shown here are both “grade 2” (of 4 possible grades on the Meyerding scale):
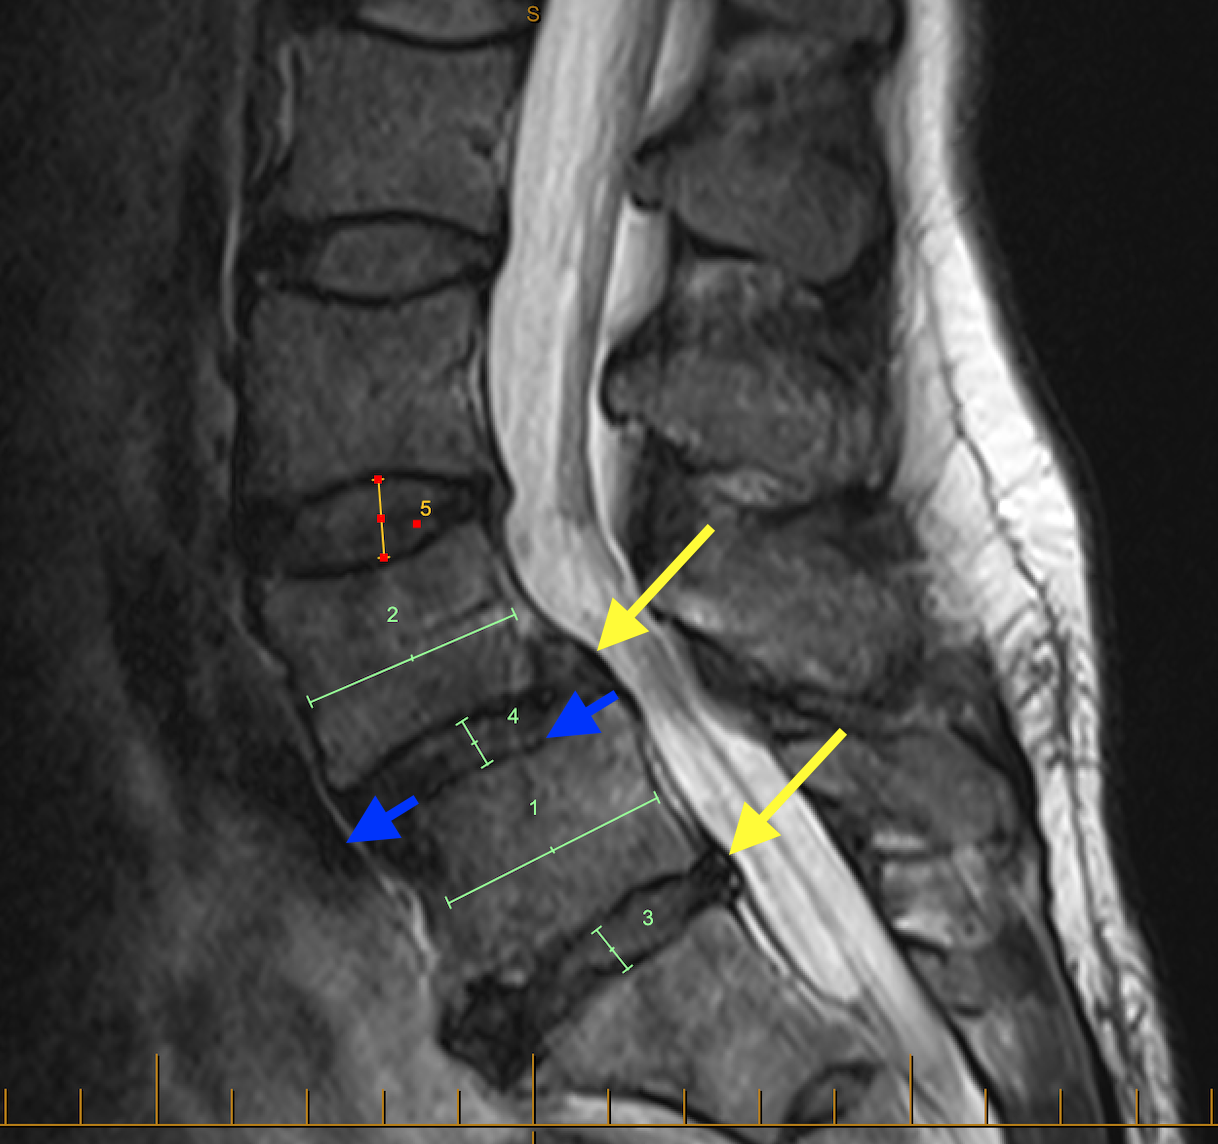
In the above image, note the very desiccated discs (dehydrated and of low height) at L4/5 (upper yellow arrow and green number 4) and L5/S1 (lower yellow arrow and green number 3) compared to the more normal, ‘plumper’ disc at L3/4 (orange number 5). The very degenerative ‘worn’ discs are like flat tyres, in need of a change for the road ahead.
FIRST STAGE OF RECONSTRUCTION – “ANTERIOR APPROACH”
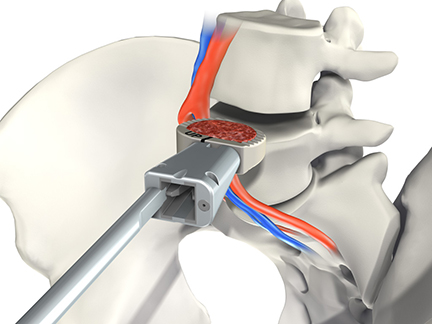
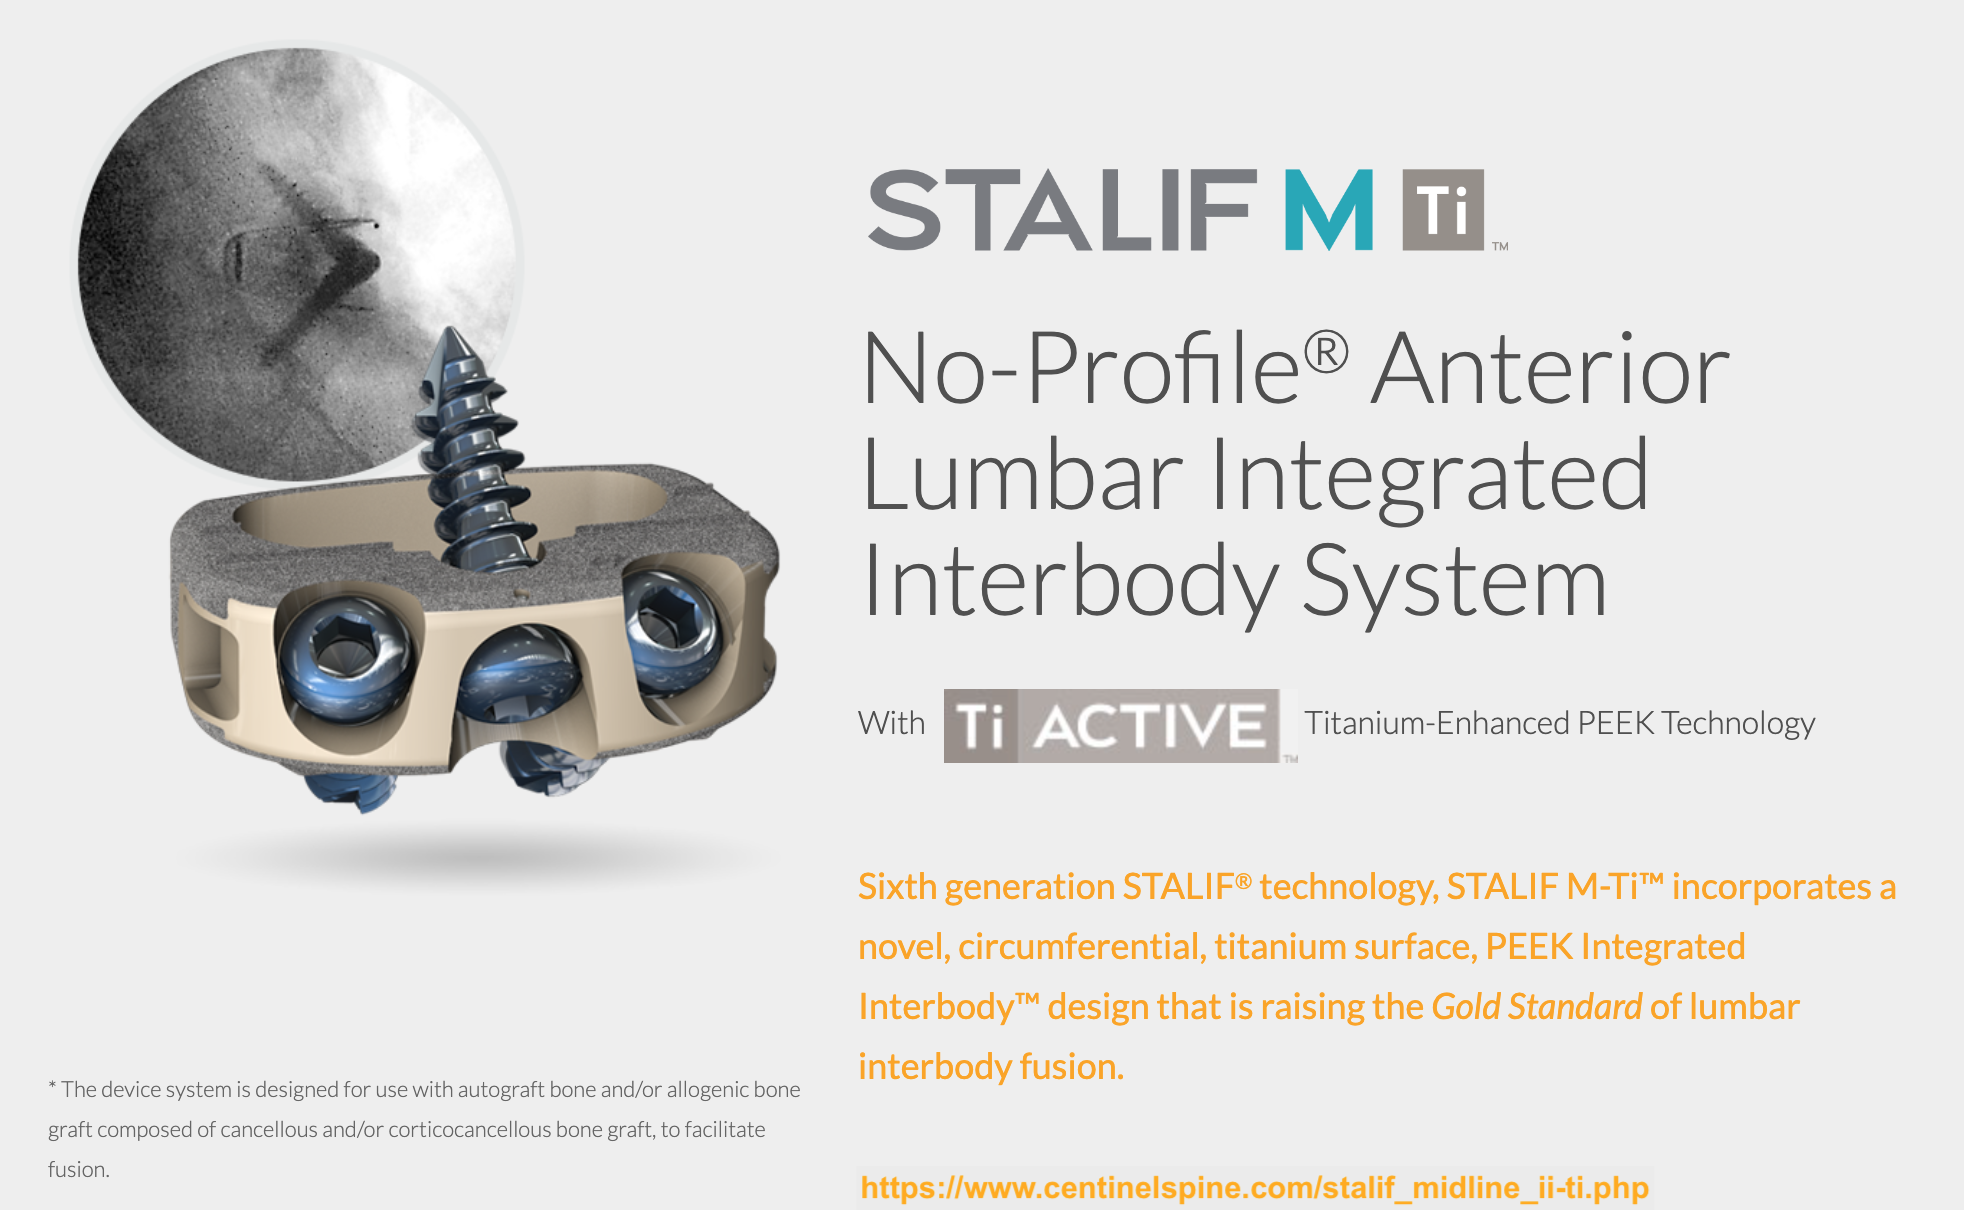
Utilising the expertise of a vascular surgeon to access the lumbar spine from around the belly button, an incision in the lower part of the abdomen exposes the underlying muscle and tendinous tissues (midline fascial layer), which are then temporarily surgically separated. The vessels and bowel structures underneath this are carefully moved (mobilised) out of the way. This is how the front surfaces of the target lumbar discs are exposed. A discectomy is carried out (by someone like me), and a suitable cage prosthesis is chosen to insert into the cleared out disc space. This an anterior lumbar interbody fusion (ALIF) using a suitable PEEK cage prosthesis with integrated titanium blades or screws. Examples below are the ROI-A and the Stalif Midline II Ti.
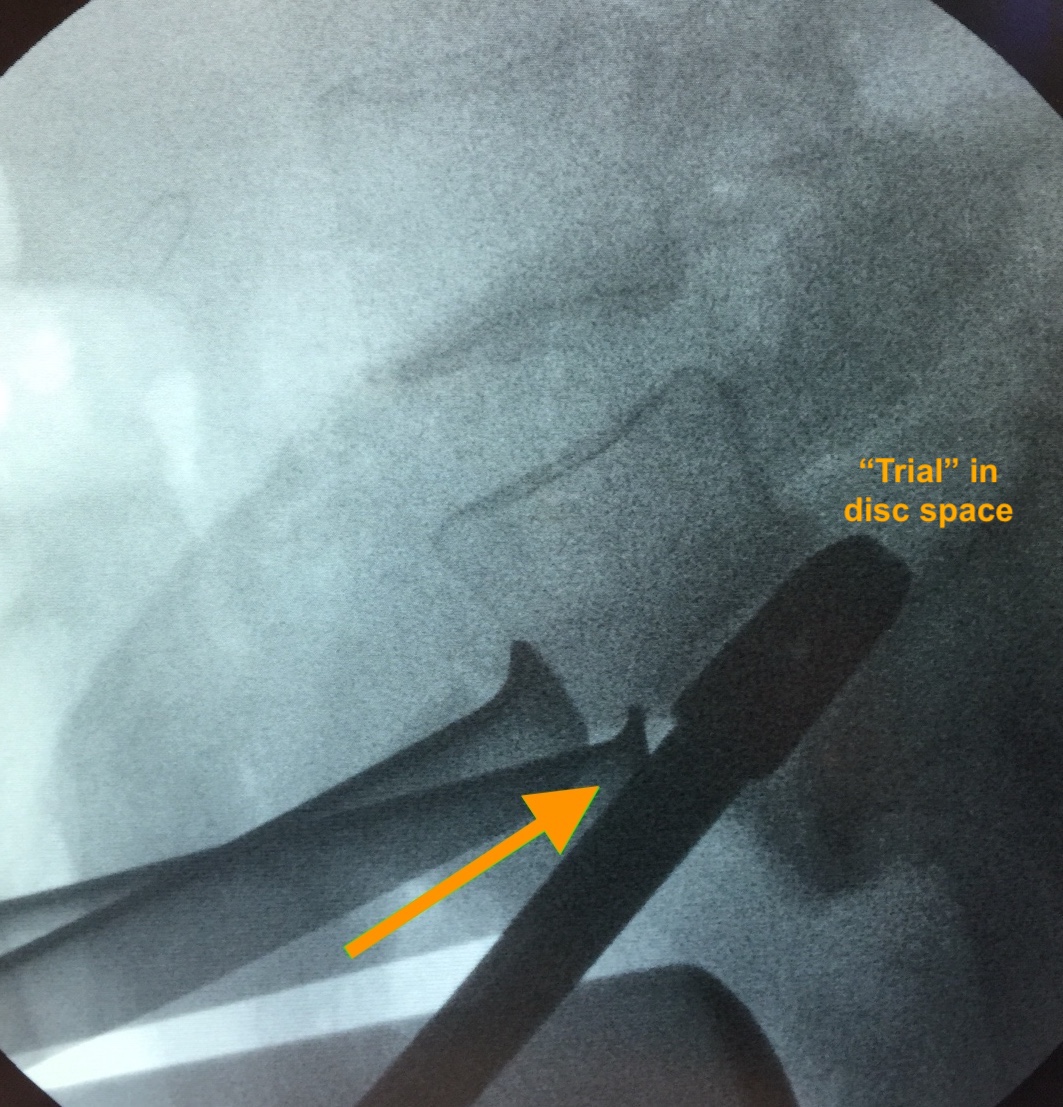
A suitable cage size (height, width, depth) and shape (wedged, with a lordosis angle) are selected based on the patient’s anatomy and what is desired for the reconstruction of this particular disc space, and what the X-rays show intraoperatively, using different ‘trials’ (see below).
The cage is then implanted and secured with integrated titanium blades or screws (see below; Stalif Midline II Ti shown). The disc height and the disc space angulation (lordosis) should be noticeably improved / restored, and the vertebral bone-framed ‘windows’ where the nerves come out at this level (the foraminae) should be more open now (i.e., indirect nerve decompression). If a person allows the discs to ‘deflate’ (desiccate/degenerate) enough over time, the vertebral body surfaces try to naturally fuse with one another (pseudoarthrosis), but the nerve windows get fused in the ‘closed’ position, which hurts the nerves (neuroforaminal stenosis or compression). Hence, restoring disc height via the ALIF procedure tries to stabilise the anatomy and keep those windows ‘open’ and their nerves ‘free’.

SECOND STAGE OF RECONSTRUCTION – “POSTERIOR” APPROACH”
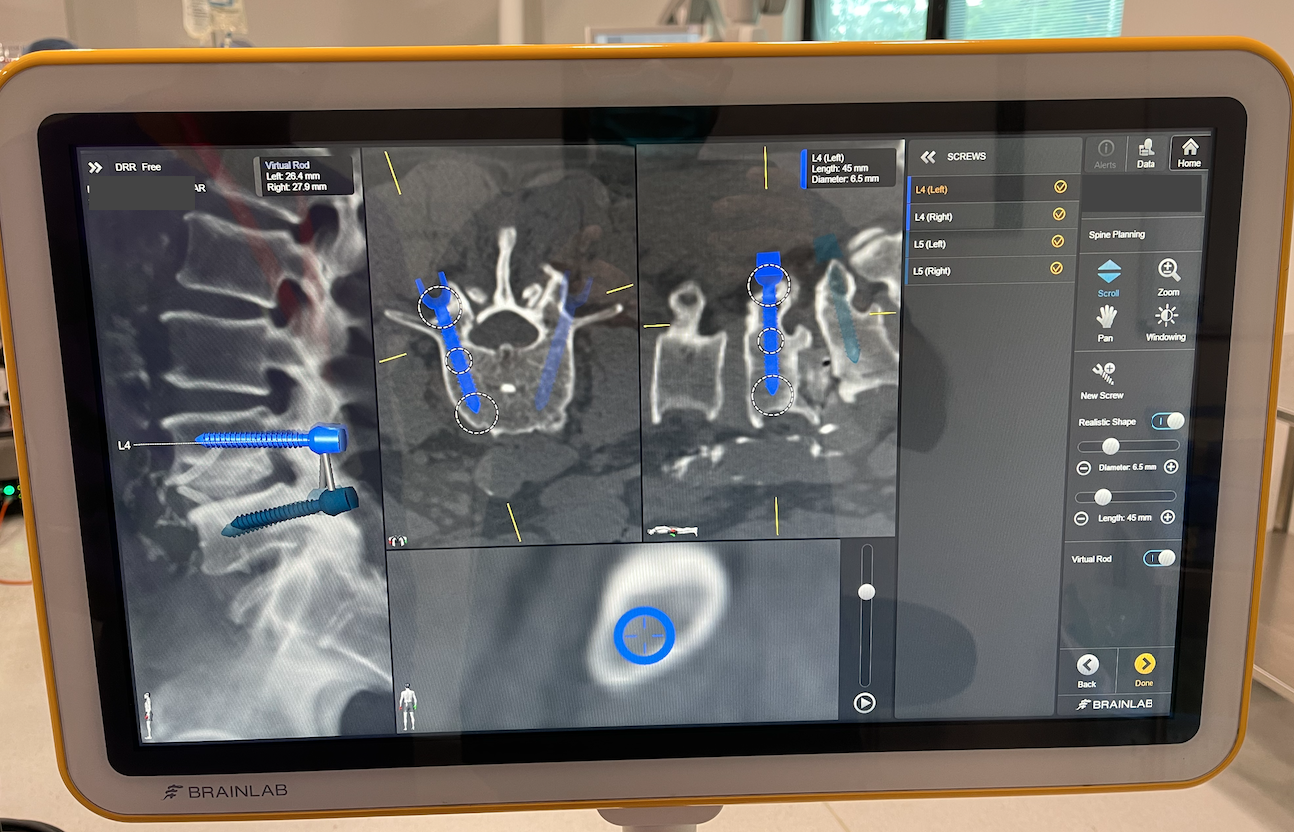
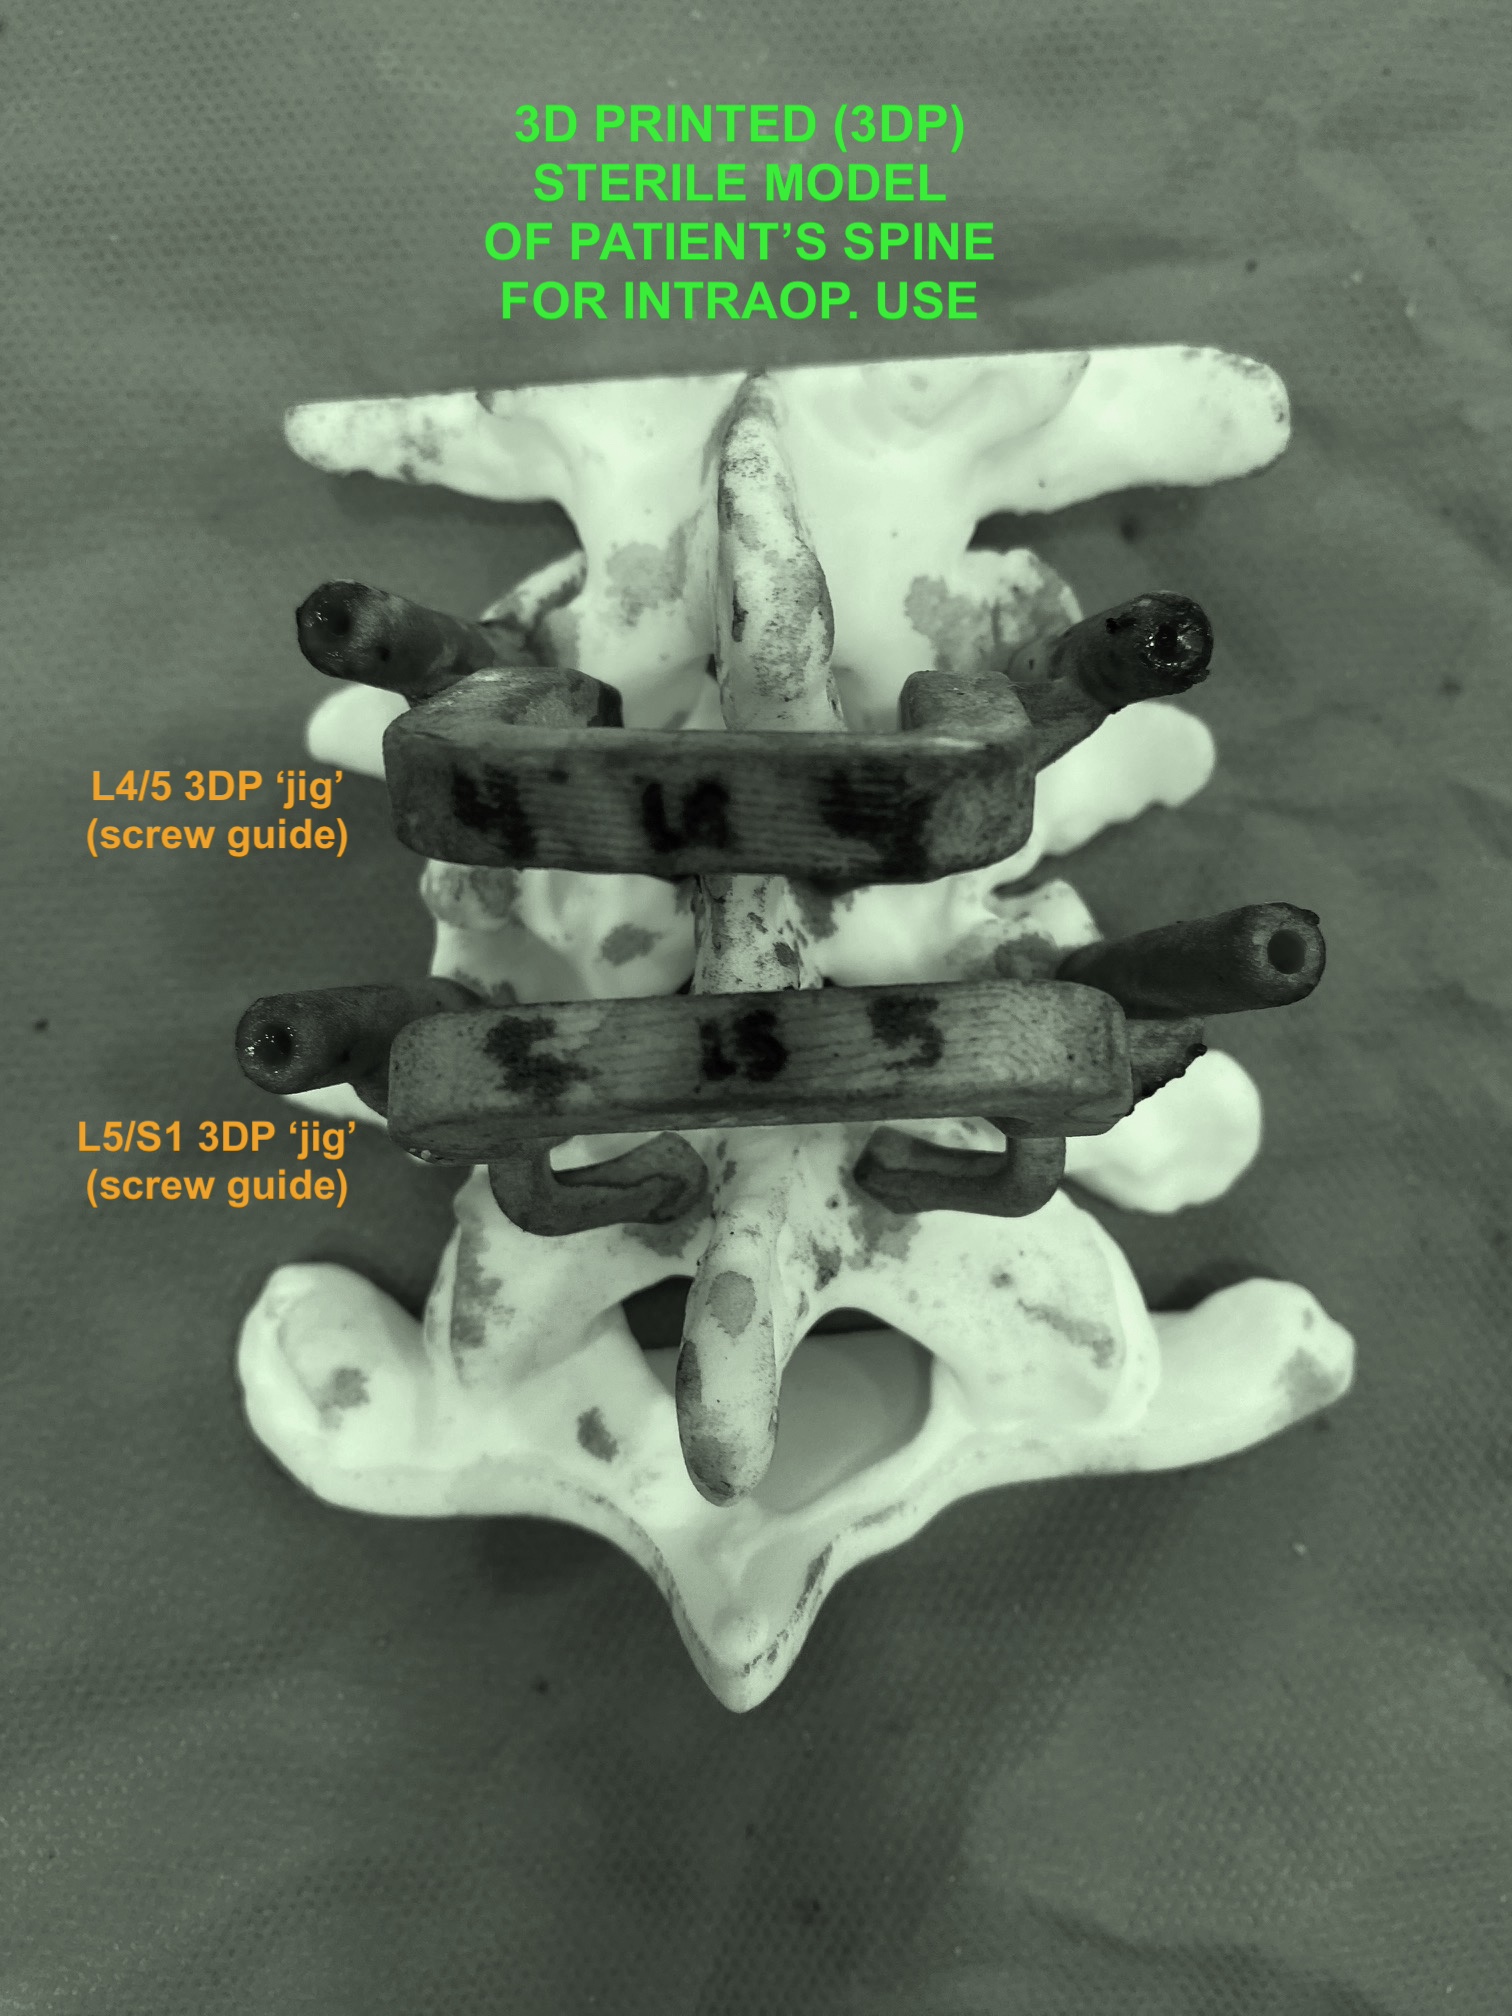
At some point following the above first stage, and usually during the same hospital admission, a second stage is carried out. This is in order to mechanically supplement/strengthen what has been done from the anterior approach, by way of “back-up” instrumentation. This adds to the stabilisation of this segment which is longstandingly anatomically deficient and naturally compromised. A standard posterior instrumentation is undertaken. This usually involves (in my own experience) posterior spinal midline exposure and then some form of guidance (e.g., mechanical/robotic, versus digital/image versus 3D-printed jigs) for transpedicular titanium screws which are lastly connected by titanium rods. Lamina-sparing spinal decompression and rhizolysis is usually carried out, with some local allograft fusion material laid down in the depths of the operative area.
The two panels below respectively show image-guidance and custom 3D-printed ‘jig’ guidance for the screws.
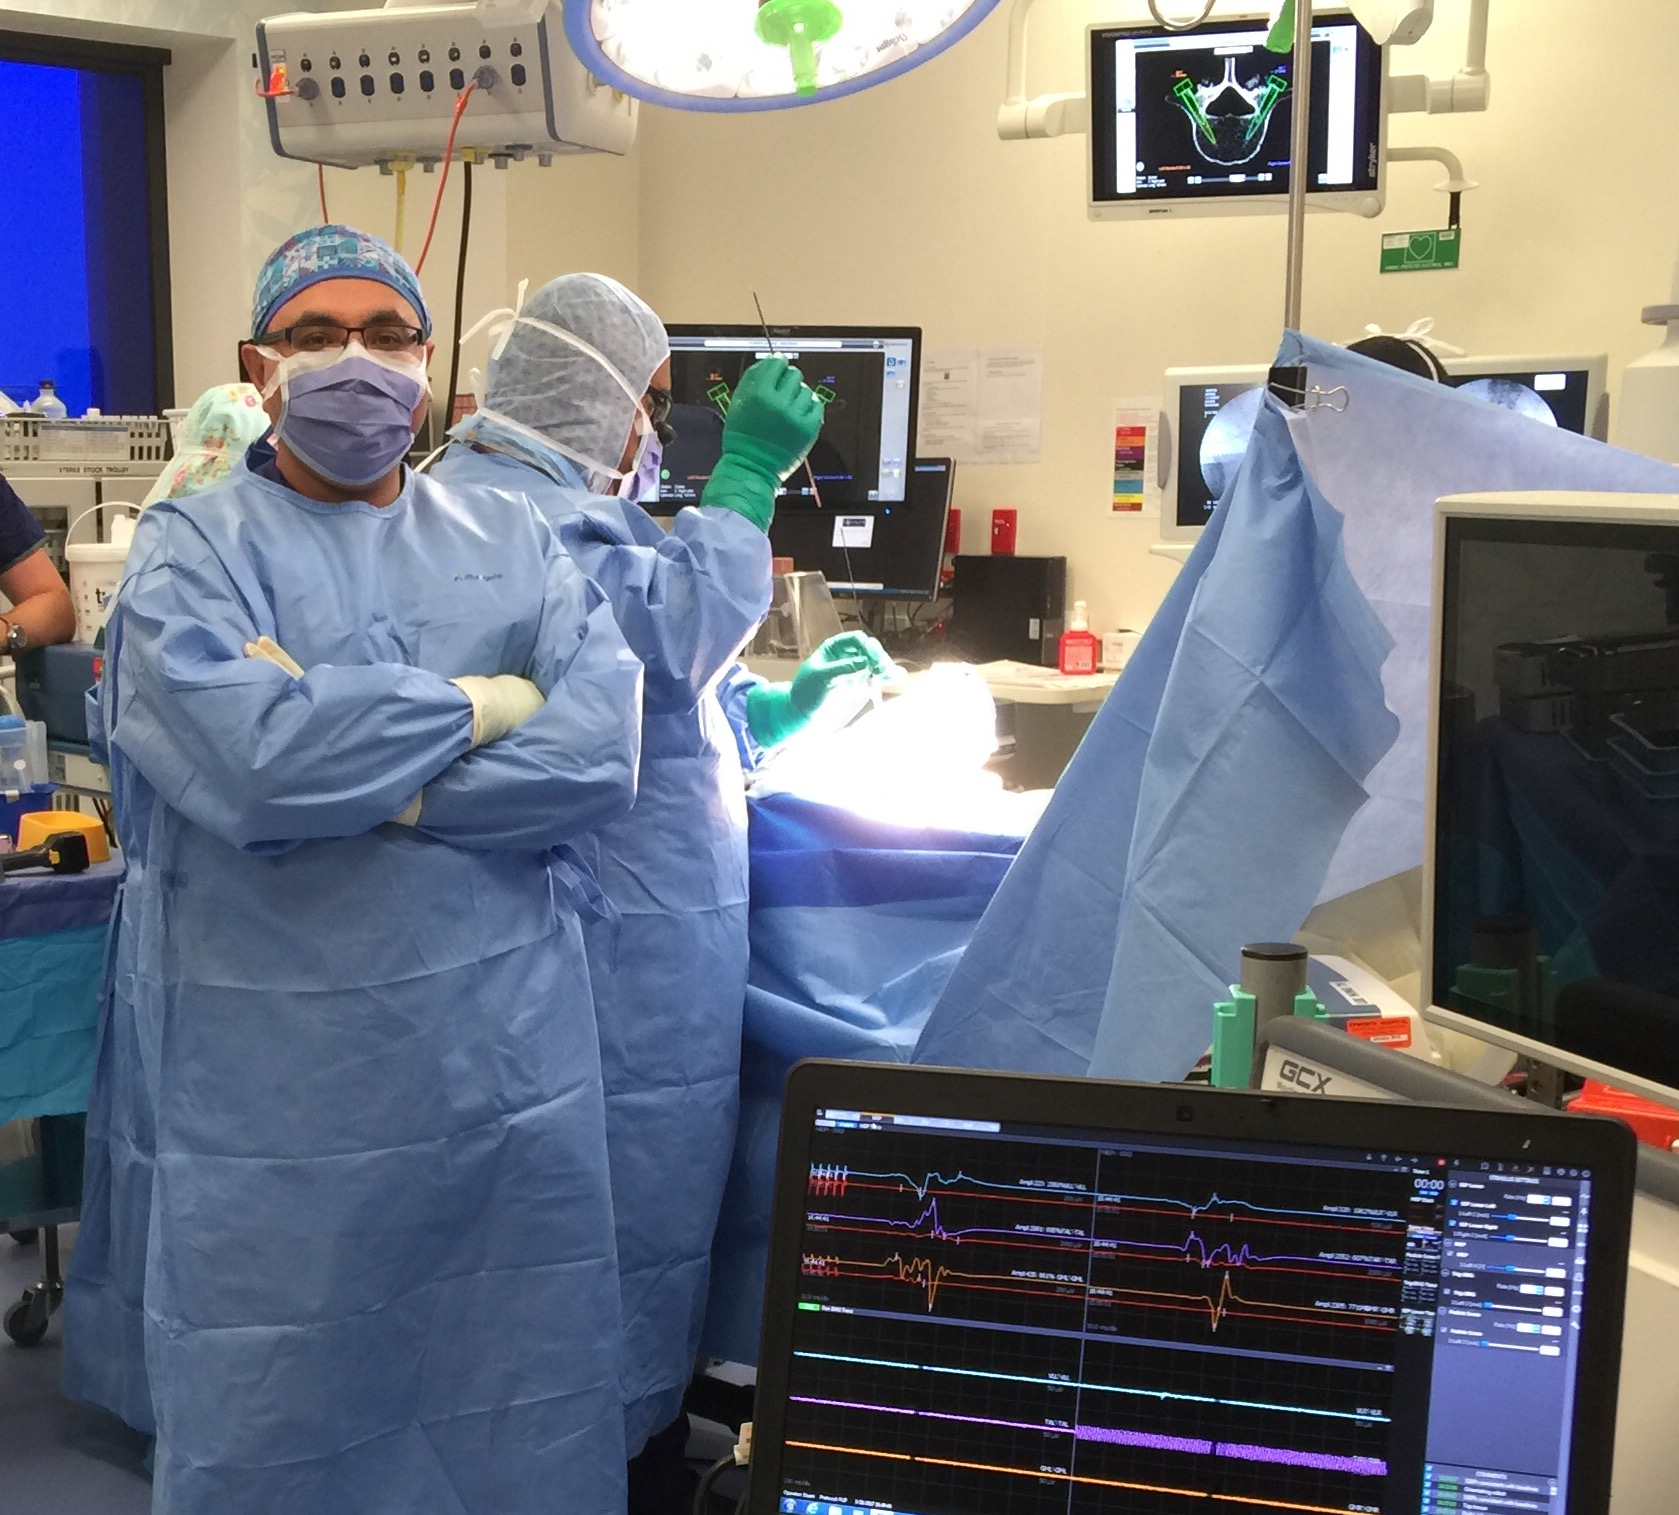
I use real-time neurological monitoring of the leg nerves and spinal cord during the posterior stage (bottom right of image immediately below). This helps my awareness of the (electrophysiological) functional condition of the nerves as the instruments are being placed.
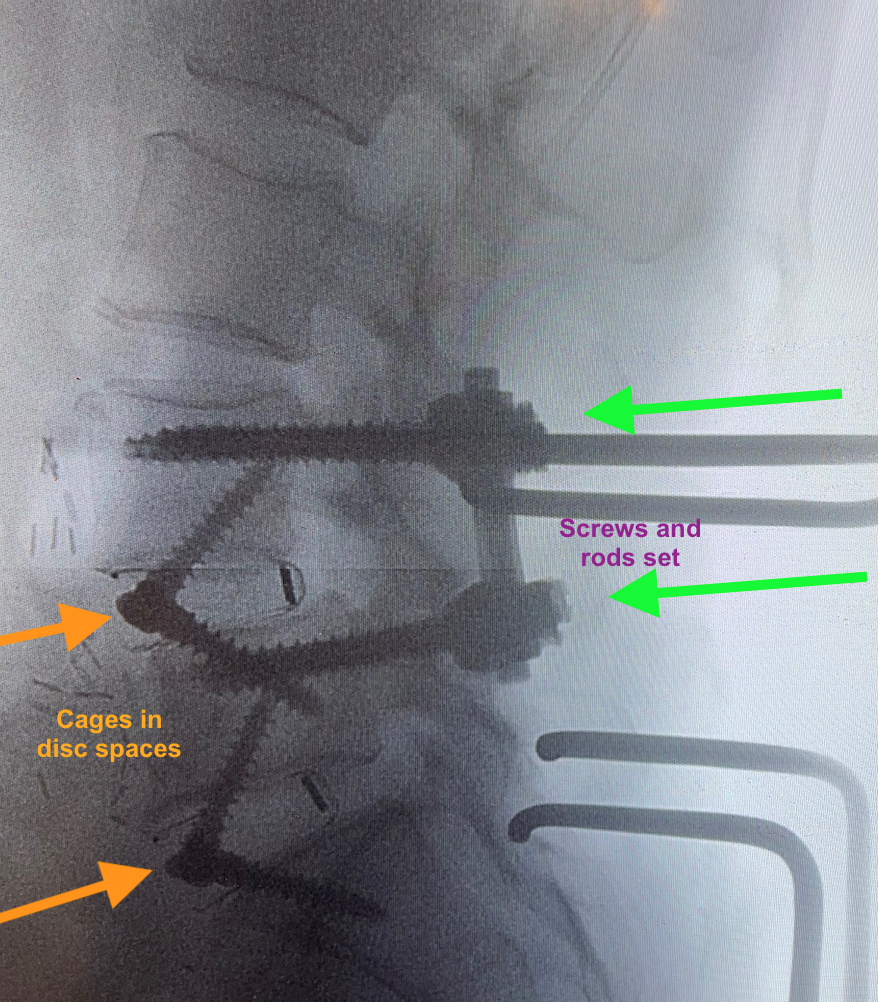
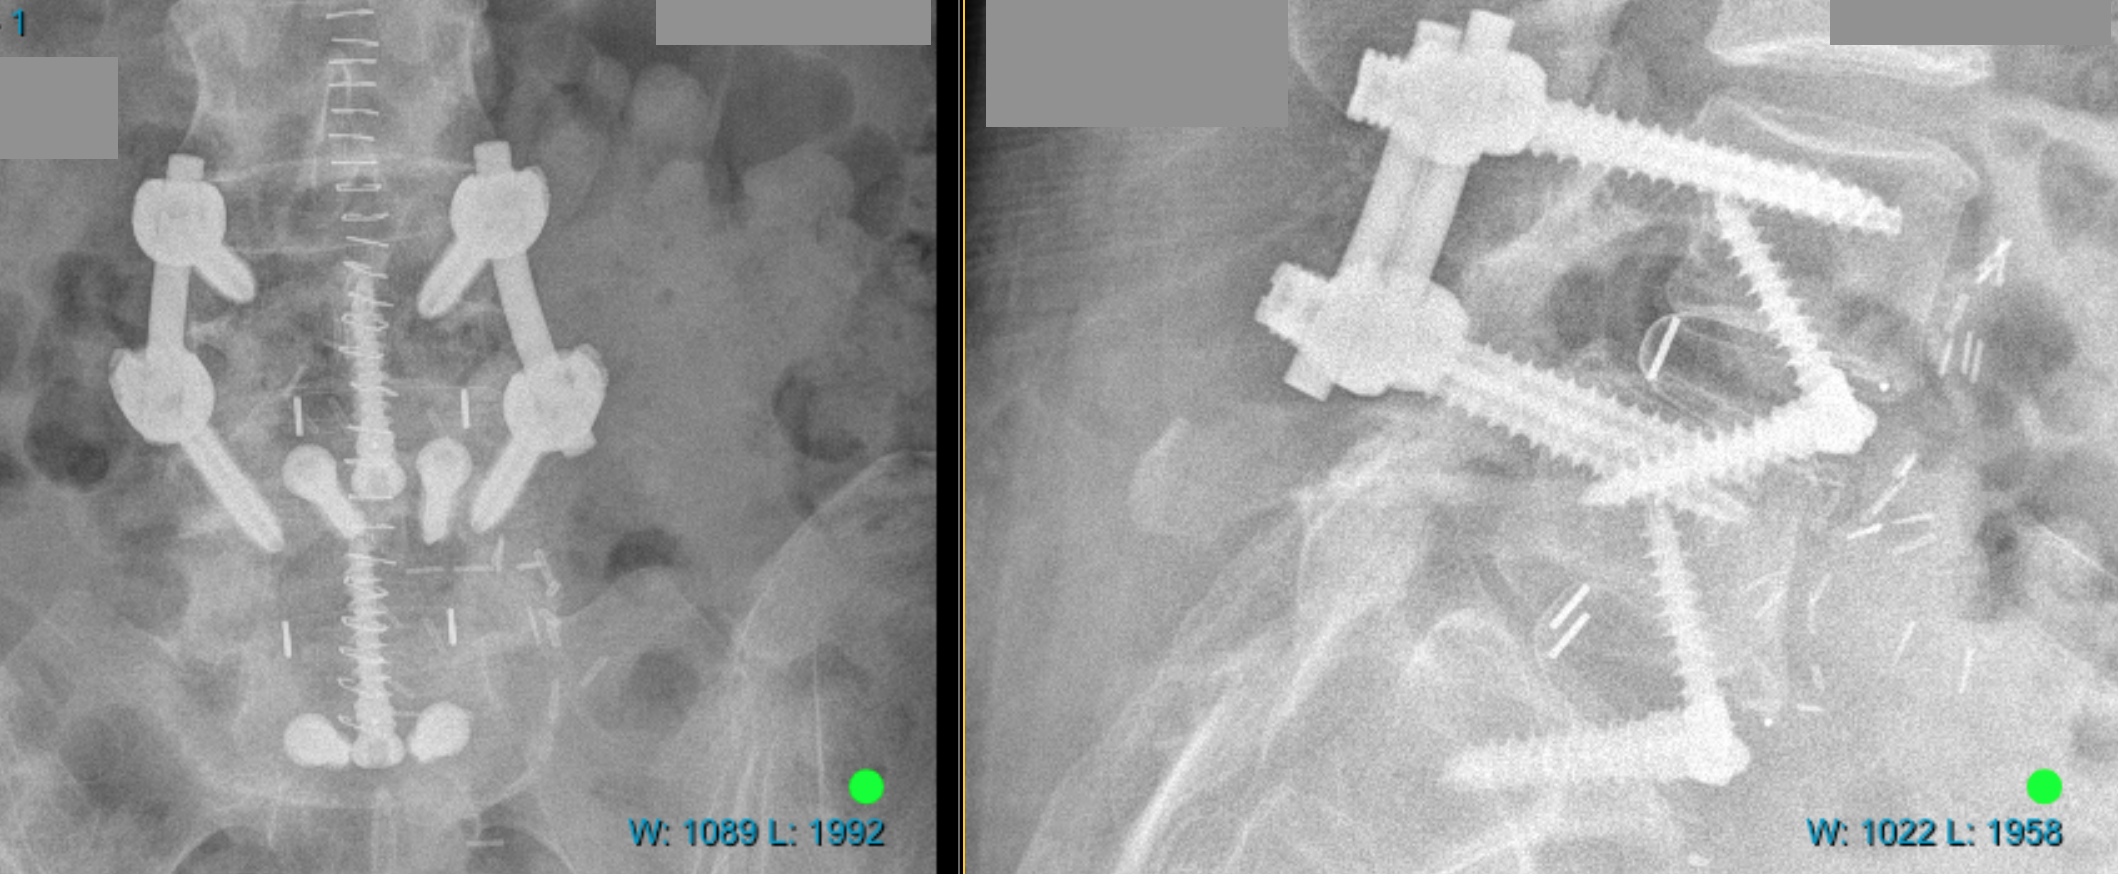
The four images below show examples of the lumbar reconstructions either intraoperatively before closure or soon after surgery.
Here is a link to a brief video of a delightful patient of mine who underwent such a procedure: